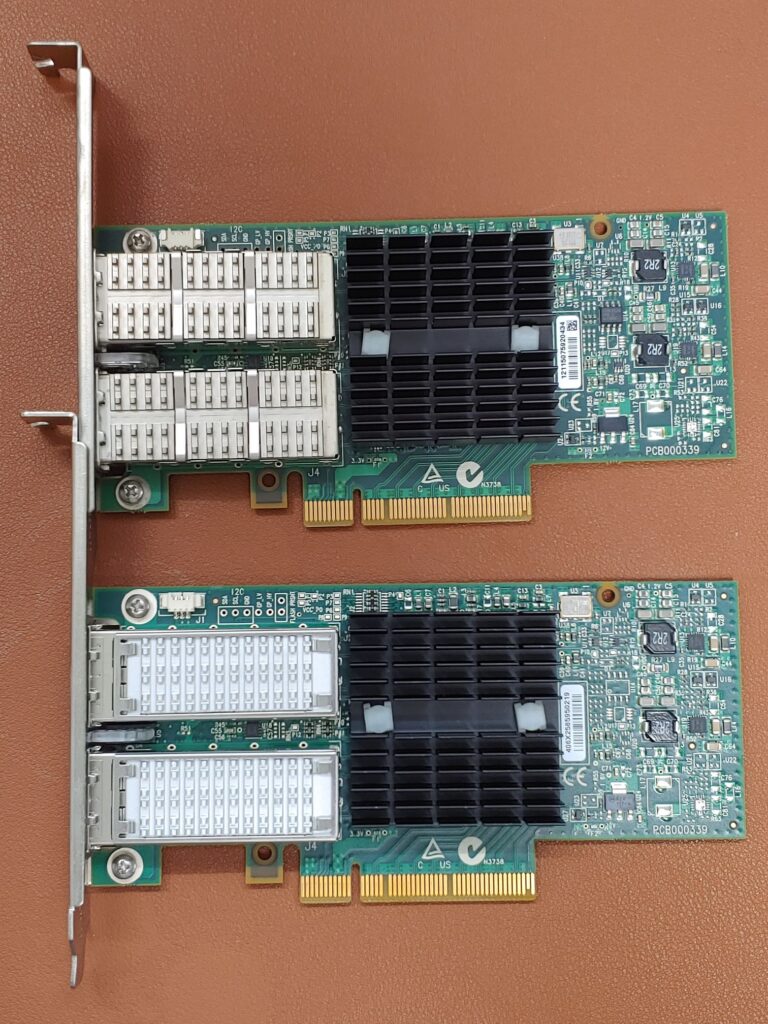
Proxmox VE에서 방 한구석에 쳐박혀 있는 Mellanox ConnectX-3 VPI Dual QSFP+ Port Adapter Card가 과연 잘 동작할까? 그래도 InfiniBand라는 건 한번 써보긴 해야하는거 아닌가? 중고가도 싼데… 이게 시작이었습니다.
일단 Proxmox VE 환경에서 펌웨어를 업데이트하고, 일단 이더넷 모드로 맞추는 것 부터 시작해야 합니다. 사용 경험이 거의 없어서 정확한 절차는 찾는게 일이 었던 것 같습니다.
항상 그렇듯 찾고 나니 쉬운 ^^
Proxmox VE에 SSH로 접속해서 진행한 내용들 정리해 보겠습니다.
파일들 준비
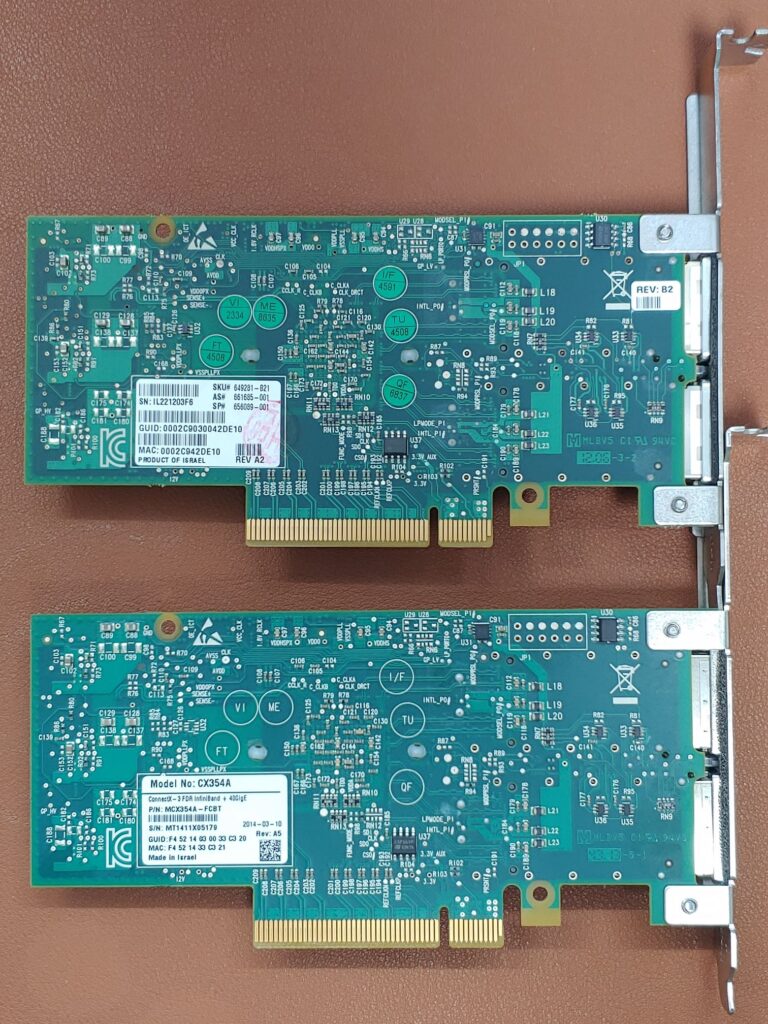
ConnectX-3 카드가 40G라고 써져 있어도 유형이 많고, OEM 버전이 많아서 모델에 맞는 펌웨어를 준비하는게 중요합니다.
첫번째 명령이 펌웨어 받는 것입니다. 이건 카드에 적혀 있는 모델명이나 파트넘버를 이용해서 검색하면 쉽게 구해질겁니다. 꼭 모델에 맞는거 사용하세요.
wget http://www.mellanox.com/downloads/firmware/fw-ConnectX3-rel-2_42_5000-MCX353A-FCB_A2-A5-FlexBoot-3.4.752.bin.zip
wget https://www.mellanox.com/downloads/firmware/mlxup/4.22.1/SFX/linux_x64/mlxup
wget https://www.mellanox.com/downloads/MFT/mft-4.22.1-11-x86_64-deb.tgz
wget https://github.com/Mellanox/mstflint/releases/download/v4.22.0-1/mstflint-4.22.0-1.tar.gz
의존성 패키지 설치와 압축 풀고 펌웨어 업데이트
apt-get install gcc make dkms pve-headers
tar -xvzf mft-4.22.1-11-x86_64-deb.tgz
cd mft-4.22.1-11-x86_64-deb
./install.sh
cd ..
chmod +x mlxup
./mlxup
mlxup 실행 화면
root@pve-sky01:~/m# ./mlxup
Querying Mellanox devices firmware ...

Device #1:
----------

  Device Type:      ConnectX3
  Part Number:      MCX354A-FCB_A2-A4
  Description:      ConnectX-3 VPI adapter card; dual-port QSFP; FDR IB (56Gb/s) and 40GigE; PCIe3.0 x8 8GT/s; RoHS R6
  PSID:             MT_1090120019
  PCI Device Name:  /dev/mst/mt4099_pci_cr0
  Port1 GUID:       f45214030033c321
  Port2 GUID:       f45214030033c322
  Versions:         Current        Available
     FW             2.11.0500      2.42.5000
     PXE            3.4.0146       3.4.0752

  Status:           Update required

---------
Found 1 device(s) requiring firmware update...

Perform FW update? [y/N]:

Restart needed for updates to take effect.
Log File: /tmp/mlxup_workdir/mlxup-20250204_193956_5677.log
root@pve-sky01:~/m#
펌웨어 업데이트하고 리부팅해야 한다고 나옵니다.
리부팅하고 나서 mst 명령을 이용해서 하드웨어를 확인합니다.
mst start
mst status
mst 명령 실행 화면
root@pve-sky01:~# mst start
Starting MST (Mellanox Software Tools) driver set
Loading MST PCI module - Success
Loading MST PCI configuration module - Success
Create devices
root@pve-sky01:~# mst status
MST modules:
------------
    MST PCI module loaded
    MST PCI configuration module loaded

MST devices:
------------
/dev/mst/mt4099_pciconf0         - PCI configuration cycles access.
                                   domain:bus:dev.fn=0000:af:00.0 addr.reg=88 data.reg=92 cr_bar.gw_offset=-1
                                   Chip revision is: 01
/dev/mst/mt4099_pci_cr0          - PCI direct access.
                                   domain:bus:dev.fn=0000:af:00.0 bar=0xee500000 size=0x100000
                                   Chip revision is: 01
root@pve-sky01:~#
mst 명령어로 확인한 디바이스 이름으로 mlxconfig 명령으로 구성 정보를 조회
mlxconfig -d /dev/mst/mt4099_pciconf0 q
mlxconfig 명령 실행 화면
root@pve-sky01:~# mlxconfig -d /dev/mst/mt4099_pciconf0 q

Device #1:
----------

Device type:    ConnectX3
Device:         /dev/mst/mt4099_pciconf0

Configurations:                                      Next Boot
         SRIOV_EN                                    False(0)
         NUM_OF_VFS                                  8
         LINK_TYPE_P1                                VPI(3)
         LINK_TYPE_P2                                VPI(3)
         LOG_BAR_SIZE                                3
         BOOT_PKEY_P1                                0
         BOOT_PKEY_P2                                0
         BOOT_OPTION_ROM_EN_P1                       True(1)
         BOOT_VLAN_EN_P1                             False(0)
         BOOT_RETRY_CNT_P1                           0
         LEGACY_BOOT_PROTOCOL_P1                     PXE(1)
         BOOT_VLAN_P1                                1
         BOOT_OPTION_ROM_EN_P2                       True(1)
         BOOT_VLAN_EN_P2                             False(0)
         BOOT_RETRY_CNT_P2                           0
         LEGACY_BOOT_PROTOCOL_P2                     PXE(1)
         BOOT_VLAN_P2                                1
         IP_VER_P1                                   IPv4(0)
         IP_VER_P2                                   IPv4(0)
         CQ_TIMESTAMP                                True(1)
root@pve-sky01:~#
SRIOV는 비활성화되어 있고, LINK_TYPE_P1, LINK_TYPE_P2가 VPI 모드로 설정되어 있는 것이 보입니다.
mlxconfig 명령을 이용해서 2개의 포트를 이더넷 모드로 설정합니다.
( 나중에 보니 한 줄에 해도 되더라고요. )
mlxconfig -d /dev/mst/mt4099_pciconf0 set LINK_TYPE_P1=2
mlxconfig -d /dev/mst/mt4099_pciconf0 set LINK_TYPE_P2=2
mlxconfig 실행 화면
root@pve-sky01:~# mlxconfig -d /dev/mst/mt4099_pciconf0 set LINK_TYPE_P1=2

Device #1:
----------

Device type:    ConnectX3
Device:         /dev/mst/mt4099_pciconf0

Configurations:                                      Next Boot       New
         LINK_TYPE_P1                                VPI(3)          ETH(2)

 Apply new Configuration? (y/n) [n] : y
Applying... Done!
-I- Please reboot machine to load new configurations.
root@pve-sky01:~# mlxconfig -d /dev/mst/mt4099_pciconf0 set LINK_TYPE_P2=2

Device #1:
----------

Device type:    ConnectX3
Device:         /dev/mst/mt4099_pciconf0

Configurations:                                      Next Boot       New
         LINK_TYPE_P2                                VPI(3)          ETH(2)

 Apply new Configuration? (y/n) [n] : y
Applying... Done!
-I- Please reboot machine to load new configurations.
root@pve-sky01:~#
리부팅하라고 합니다. 전 나오는 대로 잘 따라하는 편입니다 ^^
리부팅하고 나서 다시 mst start를 하고 구성 정보를 조회합니다.
mst start
mlxconfig -d /dev/mst/mt4099_pciconf0 q
mst와 mlxconfig 실행 화면
root@pve-sky01:~# mst start
Starting MST (Mellanox Software Tools) driver set
Loading MST PCI module - Success
Loading MST PCI configuration module - Success
Create devices
root@pve-sky01:~# mlxconfig -d /dev/mst/mt4099_pciconf0 q

Device #1:
----------

Device type:    ConnectX3
Device:         /dev/mst/mt4099_pciconf0

Configurations:                                      Next Boot
         SRIOV_EN                                    False(0)
         NUM_OF_VFS                                  8
         LINK_TYPE_P1                                ETH(2)
         LINK_TYPE_P2                                ETH(2)
         LOG_BAR_SIZE                                3
         BOOT_PKEY_P1                                0
         BOOT_PKEY_P2                                0
         BOOT_OPTION_ROM_EN_P1                       True(1)
         BOOT_VLAN_EN_P1                             False(0)
         BOOT_RETRY_CNT_P1                           0
         LEGACY_BOOT_PROTOCOL_P1                     PXE(1)
         BOOT_VLAN_P1                                1
         BOOT_OPTION_ROM_EN_P2                       True(1)
         BOOT_VLAN_EN_P2                             False(0)
         BOOT_RETRY_CNT_P2                           0
         LEGACY_BOOT_PROTOCOL_P2                     PXE(1)
         BOOT_VLAN_P2                                1
         IP_VER_P1                                   IPv4(0)
         IP_VER_P2                                   IPv4(0)
         CQ_TIMESTAMP                                True(1)
root@pve-sky01:~#
(당연한거겠지만…) 잘 변경 됐습니다.
lshw, ethtool 과 같은 명령으로 이더넷 네트워크 디바이스로 잘 인식됐는지 확인합니다.
( 디바이스 이름은 시스템 마다 다를 수 있습니다 )
lshw -c network
ethtool enp175s0
lshw, ethtool 실행 화면
root@pve-sky01:~# lshw -c network
  *-network:0 DISABLED
       description: Ethernet interface
       product: Ethernet Connection X722 for 10GBASE-T
       vendor: Intel Corporation
       physical id: 0
       bus info: pci@0000:1a:00.0
       logical name: eno1np0
       version: 09
       serial: 6c:92:bf:1a:c6:51
       size: 1Gbit/s
       capacity: 10Gbit/s
       width: 64 bits
       clock: 33MHz
       capabilities: pm msi msix pciexpress vpd bus_master cap_list rom ethernet physical tp 1000bt-fd 10000bt-fd autonegotiation
       configuration: autonegotiation=on broadcast=yes driver=i40e driverversion=6.8.12-8-pve duplex=full firmware=4.10 0x80001de3 1.2585.0 latency=0 link=no multicast=yes port=twisted pair speed=1Gbit/s
       resources: iomemory:381f0-381ef iomemory:381f0-381ef irq:29 memory:381ffe000000-381ffeffffff memory:381fff808000-381fff80ffff memory:aad80000-aadfffff memory:381fff400000-381fff7fffff memory:381fff890000-381fff90ffff
  *-network:1 DISABLED
       description: Ethernet interface
       product: Ethernet Connection X722 for 10GBASE-T
       vendor: Intel Corporation
       physical id: 0.1
       bus info: pci@0000:1a:00.1
       logical name: eno2np1
       version: 09
       serial: 6c:92:bf:1a:c6:52
       size: 1Gbit/s
       capacity: 10Gbit/s
       width: 64 bits
       clock: 33MHz
       capabilities: pm msi msix pciexpress vpd bus_master cap_list rom ethernet physical tp 1000bt-fd 10000bt-fd autonegotiation
       configuration: autonegotiation=on broadcast=yes driver=i40e driverversion=6.8.12-8-pve duplex=full firmware=4.10 0x80001de3 1.2585.0 latency=0 link=no multicast=yes port=twisted pair speed=1Gbit/s
       resources: iomemory:381f0-381ef iomemory:381f0-381ef irq:29 memory:381ffd000000-381ffdffffff memory:381fff800000-381fff807fff memory:aad00000-aad7ffff memory:381fff000000-381fff3fffff memory:381fff810000-381fff88ffff
  *-network
       description: Ethernet interface
       product: 82574L Gigabit Network Connection
       vendor: Intel Corporation
       physical id: 0
       bus info: pci@0000:5e:00.0
       logical name: enp94s0
       version: 00
       serial: 68:05:ca:0d:83:64
       size: 1Gbit/s
       capacity: 1Gbit/s
       width: 32 bits
       clock: 33MHz
       capabilities: pm msi pciexpress msix bus_master cap_list rom ethernet physical tp 10bt 10bt-fd 100bt 100bt-fd 1000bt-fd autonegotiation
       configuration: autonegotiation=on broadcast=yes driver=e1000e driverversion=6.8.12-8-pve duplex=full firmware=2.1-0 latency=0 link=yes multicast=yes port=twisted pair speed=1Gbit/s
       resources: irq:42 memory:c5ec0000-c5edffff memory:c5e00000-c5e7ffff ioport:9000(size=32) memory:c5ee0000-c5ee3fff memory:c5e80000-c5ebffff
  *-network DISABLED
       description: Ethernet interface
       product: MT27500 Family [ConnectX-3]
       vendor: Mellanox Technologies
       physical id: 0
       bus info: pci@0000:af:00.0
       logical name: enp175s0
       version: 00
       serial: f4:52:14:33:c3:21
       capacity: 56Gbit/s
       width: 64 bits
       clock: 33MHz
       capabilities: pm vpd msix pciexpress bus_master cap_list rom ethernet physical fibre 10000bt-fd 40000bt-fd 56000bt-fd autonegotiation
       configuration: autonegotiation=off broadcast=yes driver=mlx4_en driverversion=4.0-0 firmware=2.42.5000 latency=0 link=no multicast=yes port=fibre
       resources: iomemory:386f0-386ef irq:46 memory:ee500000-ee5fffff memory:386fff800000-386fffffffff memory:ee400000-ee4fffff
  *-network DISABLED
       description: Ethernet interface
       physical id: 5
       bus info: pci@0000:af:00.0
       logical name: enp175s0d1
       serial: f4:52:14:33:c3:22
       capacity: 56Gbit/s
       capabilities: ethernet physical fibre 10000bt-fd 40000bt-fd 56000bt-fd autonegotiation
       configuration: autonegotiation=off broadcast=yes driver=mlx4_en driverversion=4.0-0 firmware=2.42.5000 link=no multicast=yes port=fibre
root@pve-sky01:~# ethtool enp175s0
Settings for enp175s0:
        Supported ports: [ FIBRE ]
        Supported link modes:   10000baseKX4/Full
                                40000baseCR4/Full
                                40000baseSR4/Full
                                56000baseCR4/Full
                                56000baseSR4/Full
                                1000baseX/Full
                                10000baseCR/Full
                                10000baseSR/Full
        Supported pause frame use: Symmetric Receive-only
        Supports auto-negotiation: Yes
        Supported FEC modes: Not reported
        Advertised link modes:  10000baseKX4/Full
                                40000baseCR4/Full
                                40000baseSR4/Full
                                1000baseX/Full
                                10000baseCR/Full
                                10000baseSR/Full
        Advertised pause frame use: Symmetric
        Advertised auto-negotiation: Yes
        Advertised FEC modes: Not reported
        Speed: Unknown!
        Duplex: Unknown! (255)
        Auto-negotiation: off
        Port: FIBRE
        PHYAD: 0
        Transceiver: internal
        Supports Wake-on: d
        Wake-on: d
        Current message level: 0x00000014 (20)
                               link ifdown
        Link detected: no
root@pve-sky01:~# ethtool enp175s0d1
Settings for enp175s0d1:
        Supported ports: [ FIBRE ]
        Supported link modes:   10000baseKX4/Full
                                40000baseCR4/Full
                                40000baseSR4/Full
                                56000baseCR4/Full
                                56000baseSR4/Full
                                1000baseX/Full
                                10000baseCR/Full
                                10000baseSR/Full
        Supported pause frame use: Symmetric Receive-only
        Supports auto-negotiation: Yes
        Supported FEC modes: Not reported
        Advertised link modes:  10000baseKX4/Full
                                40000baseCR4/Full
                                40000baseSR4/Full
                                1000baseX/Full
                                10000baseCR/Full
                                10000baseSR/Full
        Advertised pause frame use: Symmetric
        Advertised auto-negotiation: Yes
        Advertised FEC modes: Not reported
        Speed: Unknown!
        Duplex: Unknown! (255)
        Auto-negotiation: off
        Port: FIBRE
        PHYAD: 0
        Transceiver: internal
        Supports Wake-on: d
        Wake-on: d
        Current message level: 0x00000014 (20)
                               link ifdown
        Link detected: no
root@pve-sky01:~#
Speed가 Unknown으로 나왔습니다. 이건 나중에 2호기 설정 끝나면 40000Mb/s 나옵니다. 56000 도 지원은 된다고 하나, 직결해서 그런지 40000 까지만 되는 것 같습니다.
( 이건 나중에 스위치 연결해서 다시 확인하는거로~)
2호기는 HP OEM 제품이라 앞에서 받은 펌웨어를 사용 못합니다. 파트 넘버로 조회하니 금방 찾아졌습니다.
업데이트 과정은 거의 같아서 생략…
숫자놀이 시간이 돌아왔습니다
이더넷 디바이스에 ip 주소 주고, MTU는 9000으로 설정한 상태에서 진행했습니다.
root@pve-sky01:~# iperf3 -c 10.0.175.212
Connecting to host 10.0.175.212, port 5201
[  5] local 10.0.175.211 port 37910 connected to 10.0.175.212 port 5201
[ ID] Interval           Transfer     Bitrate         Retr  Cwnd
[  5]   0.00-1.00   sec  2.54 GBytes  21.8 Gbits/sec    0    821 KBytes
[  5]   1.00-2.00   sec  2.65 GBytes  22.8 Gbits/sec    0    821 KBytes
[  5]   2.00-3.00   sec  1.93 GBytes  16.6 Gbits/sec    0   1.59 MBytes
[  5]   3.00-4.00   sec  1.88 GBytes  16.2 Gbits/sec    0   1.59 MBytes
[  5]   4.00-5.00   sec  2.12 GBytes  18.2 Gbits/sec    0   2.28 MBytes
[  5]   5.00-6.00   sec  2.67 GBytes  22.9 Gbits/sec    0   2.28 MBytes
[  5]   6.00-7.00   sec  2.08 GBytes  17.8 Gbits/sec    0   2.51 MBytes
[  5]   7.00-8.00   sec  1.88 GBytes  16.1 Gbits/sec    0   2.64 MBytes
[  5]   8.00-9.00   sec  1.88 GBytes  16.2 Gbits/sec    0   2.64 MBytes
[  5]   9.00-10.00  sec  1.89 GBytes  16.2 Gbits/sec    0   2.64 MBytes
- - - - - - - - - - - - - - - - - - - - - - - - -
[ ID] Interval           Transfer     Bitrate         Retr
[  5]   0.00-10.00  sec  21.5 GBytes  18.5 Gbits/sec    0             sender
[  5]   0.00-10.00  sec  21.5 GBytes  18.5 Gbits/sec                  receiver

iperf Done.
root@pve-sky01:~#
검색하니 튜닝 정보 있는 곳이 보입니다.
- https://fasterdata.es.net/host-tuning/linux/test-measurement-host-tuning/
아래 값들을 /etc/sysctl.conf 에 추가하고, sysctl -p
# increase TCP max buffer size setable using setsockopt()
# allow testing with 256MB buffers
net.core.rmem_max = 268435456
net.core.wmem_max = 268435456
# increase Linux autotuning TCP buffer limits
# min, default, and max number of bytes to use
# allow auto-tuning up to 128MB buffers
net.ipv4.tcp_rmem = 4096 87380 134217728
net.ipv4.tcp_wmem = 4096 65536 134217728
# don't cache ssthresh from previous connection
net.ipv4.tcp_no_metrics_save = 1
# If you are using [Jumbo Frames](https://fasterdata.es.net/network-tuning/mtu-issues/), also set this
net.ipv4.tcp_mtu_probing = 1
# recommended to enable 'fair queueing' (fq or fq_codel)
net.core.default_qdisc = fq
실행 할 때마다 조금 들쑥 날쑥합니다. 2번 하면 1번은 나오는 최대값은 이정도 입니다.
root@pve-sky01:~# iperf3 -c 10.0.175.212
Connecting to host 10.0.175.212, port 5201
[  5] local 10.0.175.211 port 50326 connected to 10.0.175.212 port 5201
[ ID] Interval           Transfer     Bitrate         Retr  Cwnd
[  5]   0.00-1.00   sec  2.84 GBytes  24.4 Gbits/sec    0   3.12 MBytes
[  5]   1.00-2.00   sec  2.91 GBytes  25.0 Gbits/sec    0   3.12 MBytes
[  5]   2.00-3.00   sec  2.91 GBytes  25.0 Gbits/sec    0   3.12 MBytes
[  5]   3.00-4.00   sec  2.91 GBytes  25.0 Gbits/sec    0   3.12 MBytes
[  5]   4.00-5.00   sec  2.91 GBytes  25.0 Gbits/sec    0   3.12 MBytes
[  5]   5.00-6.00   sec  2.91 GBytes  25.0 Gbits/sec    0   3.12 MBytes
[  5]   6.00-7.00   sec  2.91 GBytes  25.0 Gbits/sec    0   3.12 MBytes
[  5]   7.00-8.00   sec  2.91 GBytes  25.0 Gbits/sec    0   3.12 MBytes
[  5]   8.00-9.00   sec  2.91 GBytes  25.0 Gbits/sec    0   3.12 MBytes
[  5]   9.00-10.00  sec  2.91 GBytes  25.0 Gbits/sec    0   3.12 MBytes
- - - - - - - - - - - - - - - - - - - - - - - - -
[ ID] Interval           Transfer     Bitrate         Retr
[  5]   0.00-10.00  sec  29.0 GBytes  24.9 Gbits/sec    0             sender
[  5]   0.00-10.00  sec  29.0 GBytes  24.9 Gbits/sec                  receiver

iperf Done.
root@pve-sky01:~#
일단은 iperf3를 걍 실행시켰을 때도 20G 넘게 나오는 것에 만족합니다.
-P 4 또는 -P 8 옵션을 추가해서 멀티스레드로 하면 전체 전송 속도는 도리어 떨어졌습니다.
숫자 놀이는 좀 더 연구가 필요해 보입니다.
일단 판깔 준비는 했으니, 천천히 가지고 놀아보겠습니다 ㅋ


